
REC, Real-time Engine Capture, is a plugin for Unreal Engine, built for day to day screen capturing, virtual production, broadcast, and live capture workflows that can't afford a dropped frame. It plugs directly into your UE project with minimal setup and stays out of your way.
The core feature of REC is to capture video (and optionally audio), and write the captured data somewhere useful. The capture process is designed to be minimally invasive to the performance of the editor or your game. Compared to capturing a 3D scene to a render target and writing that render target out to video, REC is much more performant.
REC provides methods to quickly capture, when the spur of the moment dictates, and also provides methods for controlled, customizable, and repeatable captures, when needed.
Quick Start Guide (Plugin Only)
- Downloading REC Plugin from FAB
- Install Plugin (save to library)
- Add to your desired engine version
- Note: if FAB is unable to install from FAB Market Place go to the unreal tab in the epic games launcher, scroll to the bottom, find the plugin and install it to the desired engine version
- Launch Project
- Go to plugins and verify that REC is loaded
- If not click the checkbox and restart the engine
- Start Recording.
- Quick Capture: Click the REC Editor Window dropdown and adjust quick capture settings. When settings are correct, press the red button to start recording.
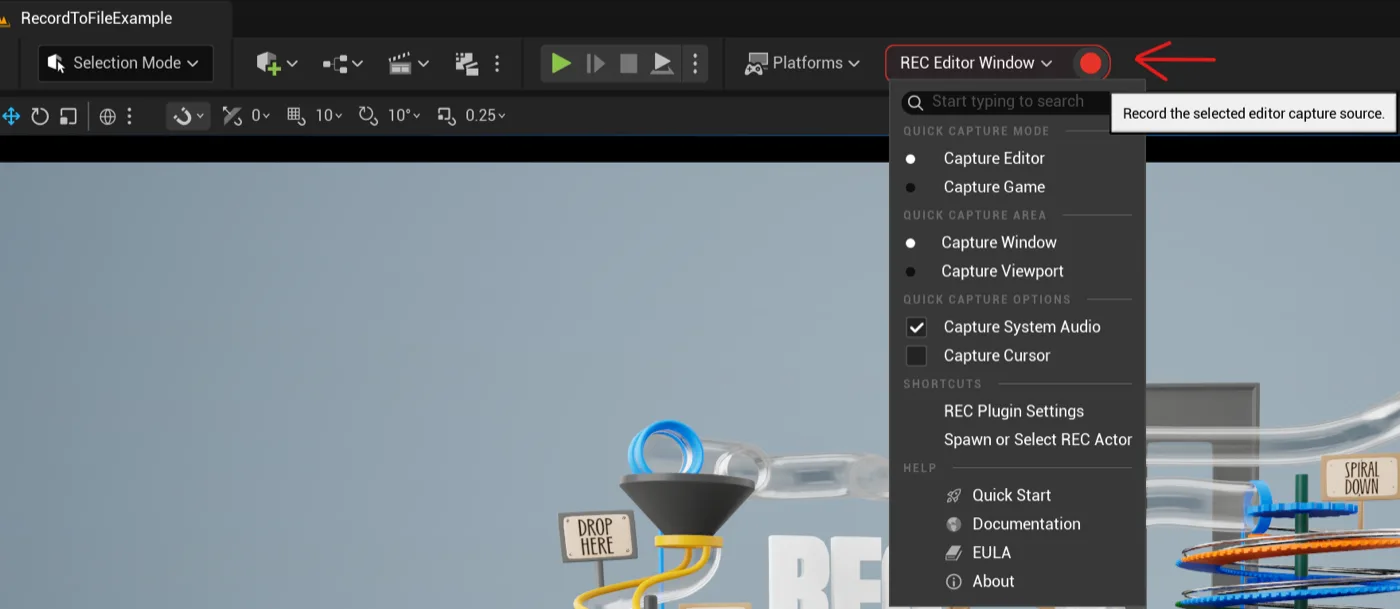
- Game Capture: Click the green play button to play in editor.
- In the top right corner of your game viewport you should see the REC logo, click on it to open up the game capture widget.
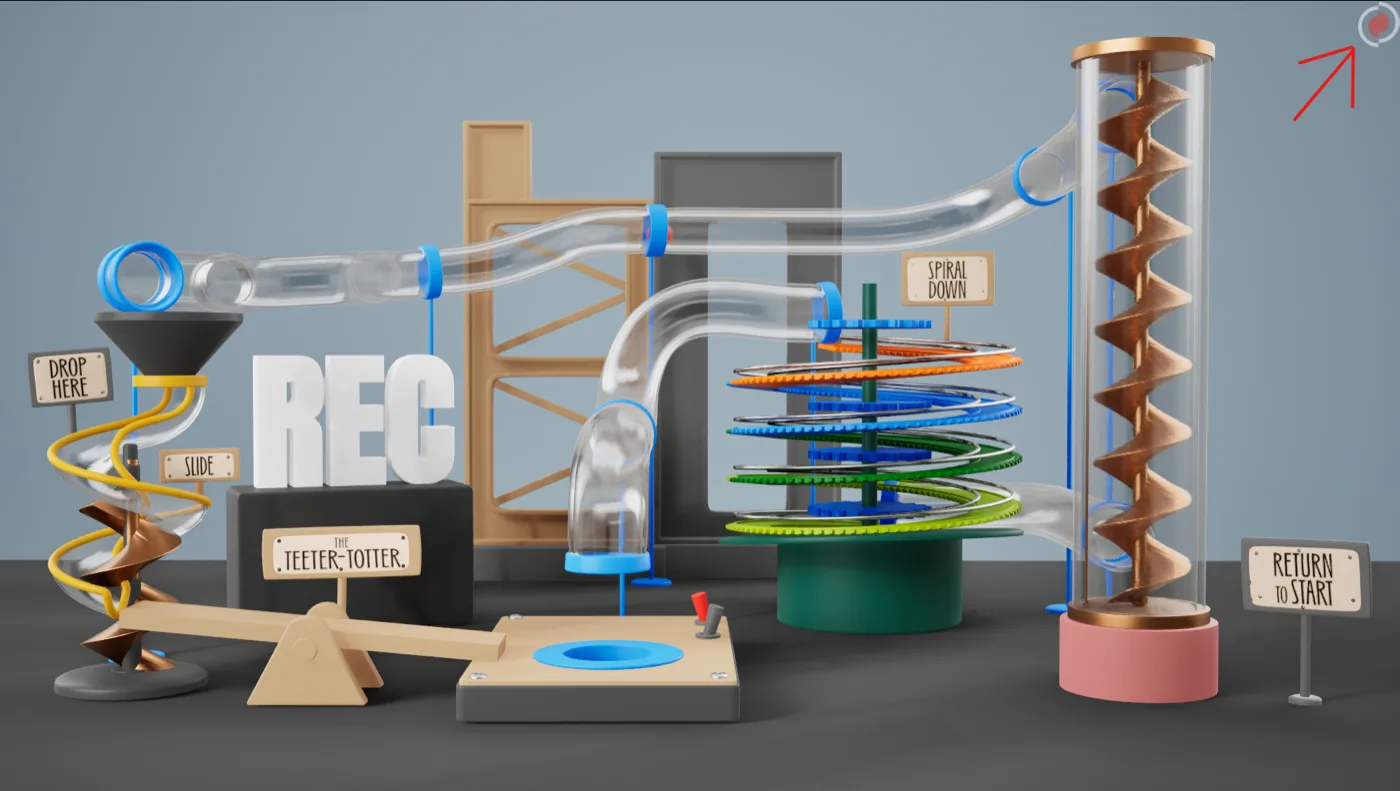
- After opening the game widget, click the preset dropdown and select REC to disk. Then press the Start In-Game Capture button to start recording.
- In the top right corner of your game viewport you should see the REC logo, click on it to open up the game capture widget.
- Quick Capture: Click the REC Editor Window dropdown and adjust quick capture settings. When settings are correct, press the red button to start recording.
Reference
How REC captures, where it sends the result, and settings you can change.
Output Modes
REC supports sending captures to multiple types of destinations.
- File Capture
- The capture is written to a file location specified by the user.
- RTMP Stream
- The capture is sent to a server using the RTMP protocol.
- This protocol is commonly used with websites like Youtube, and Twitch.
- SRT Stream
- The capture is sent to a server using the SRT protocol.
- This protocol can be set up easily without the need for a server, for example you can test an SRT stream just using VLC.
Recording Regions
REC supports 3 distinct regions of capture.
- Editor Window
- The main window of the Editor is captured.
- Useful for demonstrating development steps.
- Note that other windows that overlap the bounds of the editor window will also be included in the capture.
- Editor Viewport
- Same as Editor Window, but the capture is cropped down to the rectangle of the scene viewport.
- Game Viewport
- When in Play in Editor mode (PIE), REC captures either the viewport embedded in the editor window or the detached PIE window.
- When in Standalone Game mode, REC captures the contents of the standalone game window.
Configuring REC Capture Sessions
There are multiple ways to configure REC. Find the method that best suits your use case. We've tried to provide methods that fit the spectrum of needs of temporary, fast, simple, methodical, detailed, repeatable, and shareable.
- Quick Capture Menu
- The fastest way to choose a capture method and start / stop capture.
- The Quick Capture menu is a drop down menu found in the main editor window toolbar.
- Choose basic configurable settings like the Capture Source, Capture Region, etc.
- REC Stream Preset (RSP)
- An asset provided detailed control over every aspect of the capture method.
- RSPs can be saved to disk and tracked in source control.
- RSPs can be slotted into any capture scenario to quickly configure the capture.
- REC Stream Actor
- An Actor type which can be saved within a level.
- Can be populated using a REC Stream Preset asset, or directly in the Actor Details Panel.
- Saving the Stream Actor within the level allows capturing settings to be customized per-level if desired.
Controlling REC Capture Sessions
There are multiple ways to control REC. We've given control where it makes most sense.
- Quick Capture Button
- A red circle in the main editor toolbar, next to the REC Quick Capture dropdown menu.
- Clicking the button toggles Quick Capture on / off.
- REC Game Capture UMG Widget
- REC provides an example UMG widget that can be displayed while in-game.
- The widget's initial settings are populated using the first REC Stream Actor found in the level.
- The red button at the bottom of the widget is used to start / stop a REC capture session.
- If the settings in the widget are modified, a green button at the top of the widget "Apply to Actor" can be used to push any changes back to the Stream Actor in the level that was originally used to populate the widget.
- REC Stream Actor Blueprint API
- The Stream Actor has a component spawned on it by default, the REC Backbuffer Capture Component.
- This component provides a Blueprint (and C++) API for controlling the REC capture session directly.
Plugin Settings
Within Project Settings > Plugins > REC, one can customize the global behaviors of REC.
- Custom FFmpeg Path
- REC ships with a copy of FFmpeg.
- See our EULA for details on how this copy was built.
- If you would like to use your own copy of FFmpeg, you can specify its location here.
- Default Stream Actor Preset
- If set, when a REC Stream Actor is spawned, this preset asset will be pre-populated on the Actor.
- Default Stream Actor Settings
- If the corresponding preset is NOT set, then these settings will be used.
- Quick Capture Preset
- If set, when using the Quick Capture button, this preset is used.
- Quick Capture Settings
- If the corresponding preset is NOT set, then these settings will be used.
- Resize Capture On Source Resize
- If set, and the capture source is resized mid-capture, REC can optionally apply a scale to the framebuffer to match the original size.
- If not set, the capture session is stopped and a warning is displayed to the user.
- Auto Resize Window to Target Resolution
- If set, and a detached PIE window or standalone game window is launched, REC will resize this window prior to starting a capture session to match the desired resolution of the capture.
- Repeat Last Frame on Missed Pacing
- If set, and the capture source does not render frames quickly enough for the desired frame rate, REC will push duplicate frames in order to ensure the output stream generates frames at the desired frame rate.
- Show Notification While Capturing
- If set, an ongoing editor notification appears while REC is capturing.
- Show Notification On Capture Finish
- If set, a single editor notification will appear when REC finishes capturing.
Audio
REC supports capturing system audio. This can be helpful for capturing your game audio.
- System Audio
- The audio output device is looped back and recorded into the capture.
Video
REC supports several features to customize your recordings.
- Show/Hide your cursor (Editor Only)
- Excluding UI (i.e. REC Widget)